Fallback Configuration with Entities
Learn how to set up fallback configuration with entities in your chatbot to ensure seamless interactions with users. Improve user experience today!
Why configure Fallback with Entities?
Fallback interaction is a default interaction that appears when the bot does not recognize the user’s input.
We can use this configuration to enhance your user’s experience, instead of the virtual assistant saying, “Sorry I don’t understand”, the virtual assistant can detect keywords and give the user a list of options and next steps that are related to the actions or offered services. This will greatly increase the chances of the virtual assistant being able to be helpful to the user, even if the intent is not detected.
This is where we use Entities to allow the virtual assistant to detect key phrases and keywords such as products or service names.
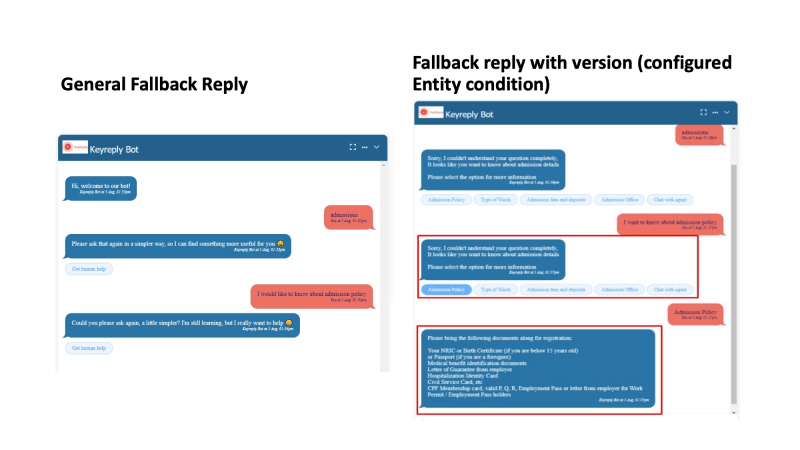
Below is the example to illustrate further, how Fallback configuration with entities can enhance the user experience and be more helpful compared to general Fallback reply.
How to configure Fallback with Entities?
The steps below needs to be followed to set up Fallback with Entities:
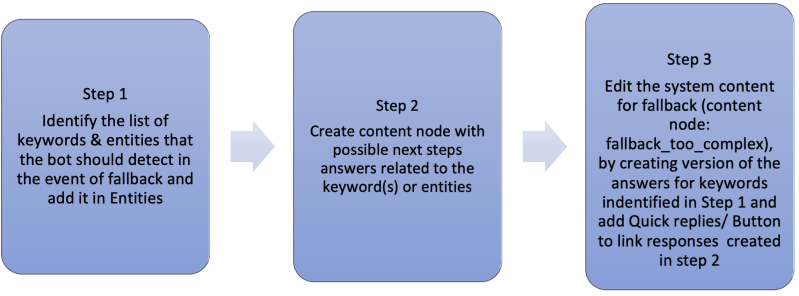
Here is the step-by-step guide on setting this up
- Select Entity from the side tab bar, and click ‘Add Entity‘ to create a new Entity or use the existing Entity list.
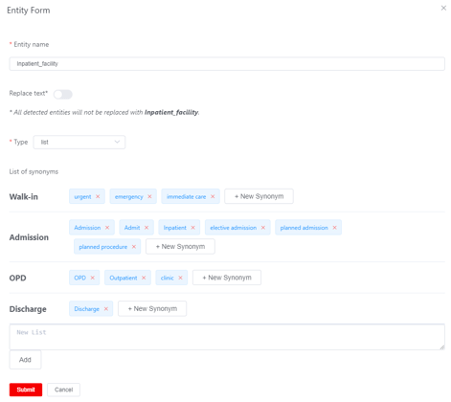
- Select Editor from the side tab bar, and select the Content tab under Nodes.
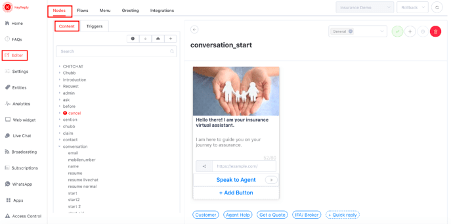
- Type ‘Fallback‘ in the Search box to locate the available “Fallback” content node.
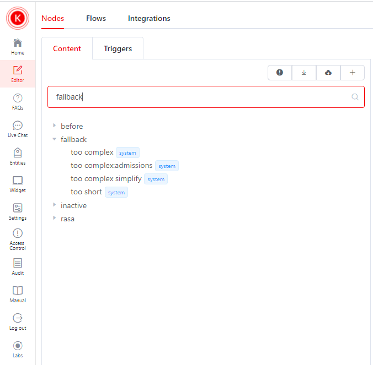
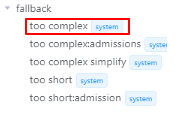
- Select ‘fallback_too_complex‘ from the list of fallback content nodes.
- Create a new version of the content node by clicking the ‘+Add Version‘ option and fill in the version name.

- Once the version has been created successfully, add the condition by clicking ‘+ Add Condition‘.

- In the ‘Choose a property’ dropdown list, select the created Entity.

- Select the required Operation and select the Entity list.

- Edit the content of the created version.
- To provide comprehensive information, you may add Quick Replies or Buttons to link to the desired content node. If required, you may also provide a link to a website.
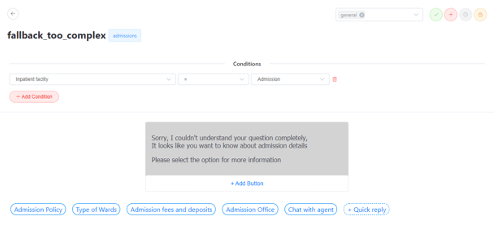
- Click on the tick on the header bar to save the content node.


