First Steps with Adding Content Nodes
Learn how to efficiently add content nodes for your virtual assistant in this step-by-step guide. Master the first steps to enhance your AI experience.
How does it work?
Usually in a store, retail outlet, or clinic, when you first see your customers, you will always greet them. Similarly, when using an AI-generated assistant, you will have a greeting or welcome message for your users. The default greeting that will be displayed to your end-users is the ‘conversation_start’ content node, and you may edit it.
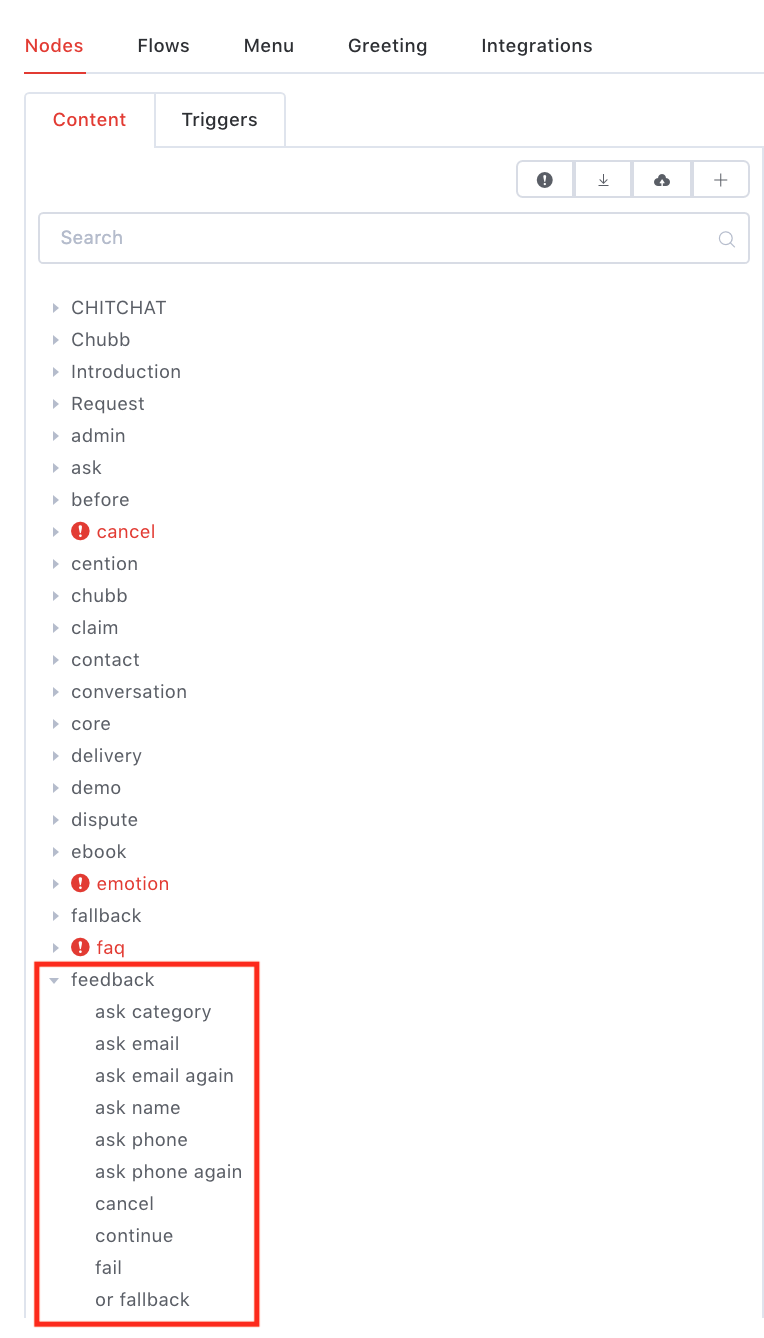
Content nodes are usually group into folders, and all the contents nodes in the same folder will be shown in a dropdown list. Folders are defined by the first word of the content node ID before an underscore. For example, to create a content node under the feedback folder, we will name the node ‘feedback_<new_node_name>’.
When naming your content nodes, separate each word with an underscore.
The content node naming convention follows the intent name. For example, for the intent ‘ask_email’, the content node name will be ‘feedback_ask_email’, with ‘feedback’ being the folder name while ‘ask_email’ is the intent name.
Similarly, if you have an intent name that is ‘ask_name’, you can create a content node called ‘feedback_ask_name’. When you view the ‘feedback’ folder in the content list, you will be able to view all the content nodes relating to feedback.

How do I begin adding content nodes?
- To begin the conversation flow, in the Content tab in Nodes, go to ‘conversation_start’. You may also use the search bar to search and retrieve the content node you wish to edit. ‘conversation_start’ is the default greeting that your bot will display to your end-users.
- To add a new content node, click ‘+’.
- Fill in the content name, and click on the tick to create the content node.
- You may proceed to edit the content node.
- Click on the tick to save the node.
Please view the video below on how to add the content nodes.


